 It’s been a crazy 5 weeks at the Flatiron School, but things are finally starting to click – thanks in part to our instructors patiently walking us through a number of examples. While this post might seem trivial to some readers, bear in mind that 5 weeks ago I had TextWrangler installed on my laptop. Ew. I know, like, for realz AND I was practicing stuff like var = x.
Anyway, fast forward to the future: the one exercise that resonated with me was one relating Pirates and Ships. It helped me understand Ruby at a time that I hit a seemingly bottomless pit of ‘why the heck don’t I get this stuff?’ desperation. Plus, it kept me entertained since every sentence invariably ended up with an “argh matey” in my head.
The good news is that after a few weeks of Ruby and a week of Sinatra, we’ve started to delve into Rails. One benefit of learning Sinatra first is that you realize how magical Rails is. Holy Shit it does WHAT for you? Everything?! You just wave your magic wand and friggin’ wha?! Ladies and Gentlemen [drumroll] et voilà [poof] ze app extraordinaire! [applause]
Not exactly.
The bad news is, we had homework due in which we were asked to populate a database and create a simple app based on a previous Sinatra application. How hard could that be? I mean Rails is freakin’ magic after all. Ok, well maybe we also had to scrape data off a website first before.
So (staring down at my laptop) my first question is how do I get data in this thing? At this point, I should mention that until recently, accessing and entering data has been something of a mystery to me. Everyone’s debugging and doing params stuff while I can’t seem to select the right command in irb that does anything useful – driving blind at 150mph. Classic. We’ll come back to that.
The first thing to grasp about Rails is that the framework is composed of three primary components the: Model, View and Controller. Note that the Model talks to the database using some Rails voodoo called ActiveRecord. I like this handy-dandy diagram because it shows you how the database interacts with the framework. But I hate this image because it confuses my thinking of where to enter my code so that it automagically pulls my data into the database. 
No worries. There must be some guide that explicitly states how to get your data in, so that you can figuratively link your model, views and controller right? Wrong. Someone tell me why there isn’t such as resource within the top 3 search results! I’ll tell you why… like duh, you just setup your models, and then your controller is a basic ruby class and then all you have to do is just populate your database and test it in your views. And if you’re having trouble with the data, you just throw in pry-debugger or raise params. Capisce? [blank stare] No.
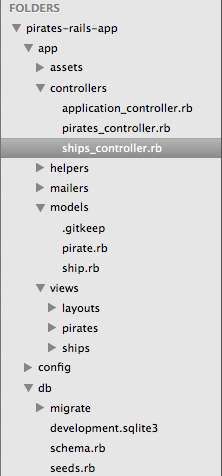
The first time I used Rails, I peeked into every folder trying to figure out the appropriate place for my database (see my Sublime sidebar below left). Now that I look at it, I feel like I should have been like: “Duh, what about the db directory?”
Let me break down my quandary for you. There are plenty search results for ‘Rails database’ but the best answers show individual chunks of code without stating where it belongs. Some people talk about creating a controller and a model, others create just a model, there are examples on how to create a rake task in the lib directory, and others still enter their code in a seeds.rb file in the db directory. Everyone online has an opinion, and everyone’s an expert.
BUT if you just want to play around with Rails to get a hang of it, here’s how I recommend you get started once you’ve installed Rails.
Step 1 – Create a new rake application and cd into your application:
> rails new pirates-rails-app
Step 2 – Create two Models (notice that Model title names are always singular):
> rails generate model Ship name:string pirate_id:integer
Follow the Rails convention of naming your components properly if you want your app to work properly. In this example we use column name and type, but you could omit this piece [name:string pirate_id:integer] and add whatever columns you like later.
You should have two new ruby class files in the Model directory.
class Pirate < ActiveRecord::Base
   attr_accessible :location, :name
end

class Ship < ActiveRecord::Base
   attr_accessible :name, :pirate_id
end
Step 3 – Enter some data to play with in the seed.rb file, which is in the db directory:
ships = Ship.create([{ name: 'Queen Anne\'s Revenge', pirate_id: 1}, {name: 'Barnacle', pirate_id: 2}])
pirates = Pirate.create([{ location: 'West Indies', name: 'Blackbeard'}, { location: 'Rumrunner Isle', name: 'JackSparrow' }])
Enter ‘rails console’ in the command line to launch Rails irb console. If you can get your data to pass muster here, it should work in the seeds file. This won’t work until you run a ‘rake db:migrate’ to migrate your data into the database. Hold off on this for a little while.
Step 4 – The easiest way to create a Controller is to generate a scaffold. You’ll probably hear all sorts of reasons why you should shun scaffolds, but it’s a great way to see how things connect:
> rails generate scaffold Ship
> rails generate scaffold Pirate
Don’t just accept this. Look at the code in the controller files to get a feel for why each block exists.
Important! Notice that controllers are always plural. So be careful if you run ‘rails generate controller pirates’ instead of scaffold. Don’t mess this one up either unless you want your app to break.
Step 5 – Get in the sandbox and play with your localhost site:
> rake db:migrate
  # this migrates your tables to the database

> rake server
  # this command will rackup a port for you to access your web app
  # "Starting Rack on port 4000" -> http://localhost:4000/

> rake routes
  # this allows you to see what web app routes are available
The View files associated with your scaffold and routes are in the view folder. Check them out and add some HTML and some styling. There’s a lot more to do, but I found this to be a good start to wrap my head around the concept of MVC and Rails.